
Table of Contents
Protecting your home is a big deal, especially when you’re investing your hard-earned savings into it. After all, what’s the point of having a beautiful roof if one bad storm could damage everything, from your shingles to your pipes? The reality is, even the best roof can fall short without the right protection. That’s where roof underlayment installation comes in. Think of it as an essential weather-resistant layer, sitting snugly beneath your shingles, acting as a first line of defense. It’s what keeps your roof strong and secure, ensuring that no matter what the weather throws at it, rain, snow, or high winds, your home stays safe and dry. In this blog, we’ll talk about the importance of roof underlayment, how it works, and why installing it correctly should be at the top of your priority list.
Why Underlayment Matters

Credit: rayproroofing.com
I think you’ll only make up your mind about roof underlayment installation if we talk about its importance.
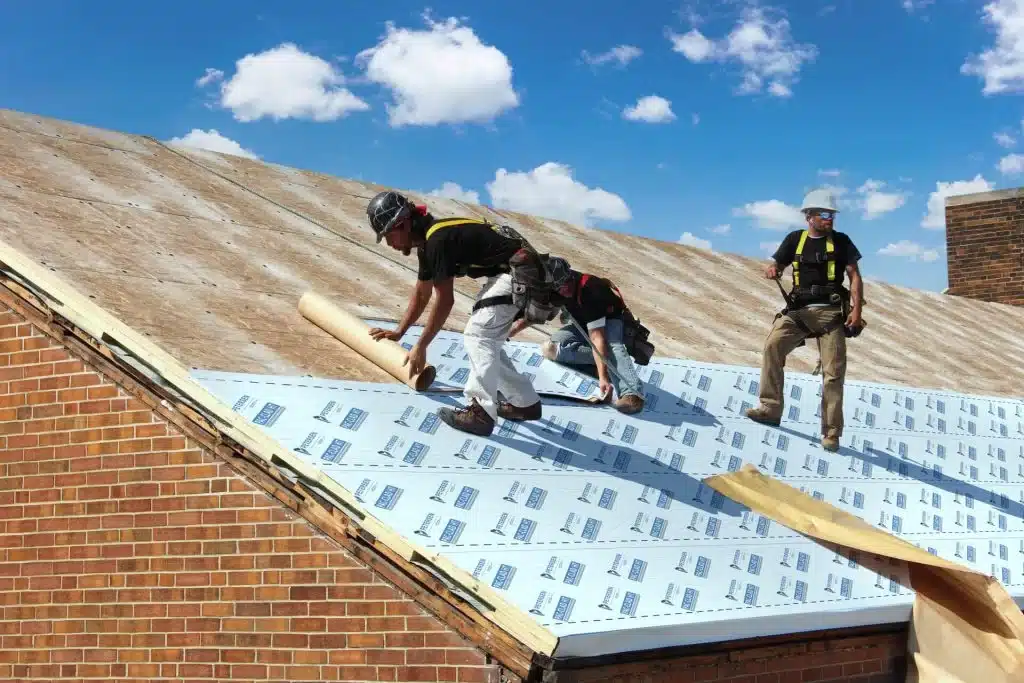
The roof underlayment sits directly on your roof decking — that’s usually plywood or OSB. Then comes shingles (or another roof covering). The roof underlayment acts as a moisture barrier. It protects your structure from leaks if water gets past the shingles.
It’s also a second line of defense — a safety net. If wind‑driven rain, snow, or ice dams do their thing, the underlayment helps keep that water from seeping into your home.
Plus, it gives a more even surface under the shingles. If your deck is slightly uneven or weathered, underlayment for a metal roof or asphalt-saturated felt helps “smooth things out,” reducing the chances of shingles being stressed or damaged.
In short, roof underlayment isn’t optional. It’s a must if you want a roof that lasts.
Picking the Right Underlayment
Not all underlayments are created equal. The choice depends on your roofing material and climate. Here are common types:
- Traditional asphalt-felt (tar paper) — This is the old-school, tried-and-true underlayment. It’s affordable, breathable, and works well for many shingle roofs.
- Synthetic underlayment — These newer materials are often more durable, resistant to tearing, and lighter to work with. Many roofing companies prefer these for asphalt shingles or metal roof systems.
- Self-adhering / rubberized asphalt underlayment — These stick directly to the roof deck, offering strong waterproof sealing. Great for areas with heavy rain or snow.
Tip: Be sure to choose an underlayment that’s suited to your specific roof and weather conditions. If you’re in an area that faces high winds or frequent storms, a strong underlayment can be a real lifesaver. If you’re considering roof options for rainy weather, check out our post on the best roof for rain to see which roofing systems hold up best against the elements.
Tools & Materials for Roof Underlayment

Credit: roof-crafters.com
Before we start installing, let’s make sure you’ve got everything you need. Here’s a quick list of tools and materials that will make your job a whole lot easier:
Tools
- Utility knife: For cutting underlayment for a metal or asphalt-saturated felt to size.
- Chalk line: To mark straight lines for accurate placement.
- Hammer: For driving nails in place.
- Tin snips: For cutting metal or flashing around edges.
- Stapler or roofing nails: You’ll need these to fasten the underlayment securely. Roofing nails are often best for longer-lasting results.
- Measuring tape: To measure the roof, the underlayment, and make sure everything fits just right.
- Ladder or scaffolding: Safety first! Make sure you’re working from a stable height.
Materials
- Underlayment rolls: Choose your roof underlayment based on your roof type and local weather.
- Drip edge: A metal flashing piece that sits on the edges of the roof to direct water away.
- Nails or cap nails: These will fasten the roof underlayment to the roof deck.
- Sealant or roofing tape: To seal seams and areas around vents, chimneys, or skylights.
Having everything laid out and ready before you start can make the process go a lot smoother.
Step-by-Step: Installing Roof Underlayment
Here’s a step‑by‑step process that many roofers follow to get roof underlayment installation right.
Install the Drip Edge

Credit: homeguide.com
Begin by installing a drip edge along the eaves. This helps direct water away from the fascia and prevents water from seeping under the roofing system.
- Overlap each drip edge section by at least 2 inches if using multiple pieces. Nail them down about every foot (depending on the instructions).
- The drip edge ensures water runoff doesn’t undermine your roofing layers.
Snap a Chalk Line & Align the First Layer
Use a chalk line to mark a straight starting line along the bottom of the roof. This helps keep your underlayment aligned and even.
- Roll out the first strip of roof underlayment along the bottom (eaves), allowing a small overhang past the drip edge, about ½ inch, so water drips into gutters, not back under the roof.
- Smooth it out carefully. Avoid wrinkles or bubbles. These can compromise water protection or cause uneven wear.
Fasten the Underlayment Securely

Credit: eagleroofing.com
Use appropriate fasteners, roofing nails, plastic‑cap nails, or staples (depending on product instructions). In high-wind or exposed areas, make sure fasteners meet local code or manufacturer specs.
- If using synthetic underlayment, consider cap nails for better holding power.
- Don’t over‑stretch the roof underlayment while fastening. It should lie flat, snug, and smooth.
Overlap Each Layer Properly
When laying the next strip, overlap the previous row. A typical overlap is at least 3–6 inches (depending on product guidelines). This overlapping seal helps block water infiltration.
- For end laps (where one roll ends and another begins), stagger them. Avoid aligning end seams in consecutive rows; this reduces water penetration risk.
- Ensure edges under rakes or sidewalls go under the drip edge or are properly sealed according to local code or roofing specs.
Address Valleys, Protrusions, and Penetrations

Credit: basc.pnnl.gov
For valleys (where two roof slopes meet), first lay a central strip of roof underlayment down the valley before the rest of the layers. This adds extra protection where water flow is heavy.
- Vertical protrusions (chimneys, skylights, vent stacks) need roof underlayment to go up at least 6 inches and be sealed with compatible sealant or tape. This prevents water from sneaking in around the edges.
- If using a “waterproof” self-adhering underlayment, especially in heavy-rain or snowy climates, make sure you follow its specific sealing and overlapping instructions for best results.
Final Checks & Prep for Shingles
Once the roof underlayment is fully nailed/stapled down and overlaps are all sealed, do a final inspection. Look for wrinkles, bubbles, loose edges, or exposed areas. Fix them before moving on.
- Make sure the attic or roof cavity has proper ventilation. Moisture trapped under the roof underlayment can cause condensation, which might damage the roof decking over time.
- Keep the underlayment dry until the roof shingles (or other roof covering) are installed. Wet roof underlayment can shrink, shift, or degrade.
Common Mistakes (And How to Avoid Them)
Even experienced DIYers or roofers can slip up. Here are mistakes to watch out for — and skip if you want a roof that lasts.
- Skipping prep work: Installing underlayment on the roof over a dirty, rough, or damp deck leads to leaks or roof underlayment failure. Clean every inch.
- Poor alignment or uneven install: Crooked install or wrinkles can create weak spots. Use chalk lines and smooth everything carefully.
- Insufficient overlaps: Weak overlapping invites water infiltration. Always overlap as per manufacturer instructions.
- Wrong fasteners or wrong spacing: Using improper nails or spacing them too far apart reduces holding strength and wind resistance.
- Neglecting valleys and penetrations: Those are weak spots. If not sealed correctly, they’ll leak first.
- Not drying or ventilating the roof deck: Trapped moisture or wet roof underlayment can lead to mold, rot, or decking damage over time.
Fixing these mistakes before shingles go on can save a lot of headaches (and money) down the road.
Why This Proper Installation Pays Off
Getting roof underlayment installation right does more than just “cover your roof deck.”
- It extends the lifespan of your roof by keeping water out and protecting the deck and structure underneath.
- It prevents leaks — even in heavy rain or after wind-driven storms.
- It improves energy efficiency and ventilation, because a well-installed roof underlayment — combined with proper attic ventilation — helps regulate moisture and temperature.
- Last but not least, it gives peace of mind, knowing your roof has that extra layer of protection.
In many ways, roof underlayment is the unsung hero of roofing. Without it, shingles alone can’t guarantee long-term security.
Final Words
In a nutshell, installing roof underlayment might seem like just “another step,” but it’s one of the most important. Skip it, or mess it up, and your roof becomes vulnerable. Done right, though, and you’re giving your home long-lasting protection from rain, snow, wind, and weather.
If you take the time to prep the deck, pick the right underlayment, overlap correctly, seal valleys and penetrations, and fasten everything securely, you’ll end up with a roof that stands strong for years.
So the next time you or your roofer works on a roof, remember: roof underlayment installation does matters.
Frequently Asked Questions
Need help with roof underlayment installation? Here are some answers you might be looking for.
Is roof underlayment required under all roofs?
Not always strictly required by code, but widely considered best practice. Roof underlayment adds that essential layer of protection, so skipping it is risky.
Can I use traditional asphalt felt instead of synthetic underlayment?
Yes. Asphalt-felt (tar paper) is still a valid option. It’s usually cheaper and breathable, but synthetic underlayment tends to give better tear resistance and durability.
How much overlap do underlayment layers need?
It depends on the product guidelines. But generally, overlaps of at least 3–6 inches are common. End laps should be staggered for better water protection.
What about valleys, chimneys, and vents? How do I handle those?
Those areas need special attention. Valleys often get a central roof underlayment strip first, then overlapping layers. Around chimneys/vents/skylights, the roof underlayment should go at least 6 inches up and be sealed properly.
Can I install underlayment in cold or damp weather?
It’s best to install when the roof decking is clean, dry, and free of debris. Moisture or dampness can compromise adhesion or lead to future problems, so wait for dry conditions.