
Table of Contents
Are you tired of experiencing that water drip getting into your roof’s fascia? For this, there is one thing you can definitely do: install a roof drip edge. When you live in a place where the weather tends to be unpredictable, you must keep checking the top of your house. We’re saying this because due to the rain, water damage reaches your rooftop’s shingles, and you can guess what happens further. During house construction, the most essential thing is to keep the exterior portion of it in mind, especially the roof. Whether you go for the protective and affordable roll roofing or any other kind depends on you as you are the house owner. However, you need to stop worrying, as we will take a detailed journey on how to protect our roofing with the help of a drip edge. So, let’s not waste any further time and look into it!
Roof Drip Edge
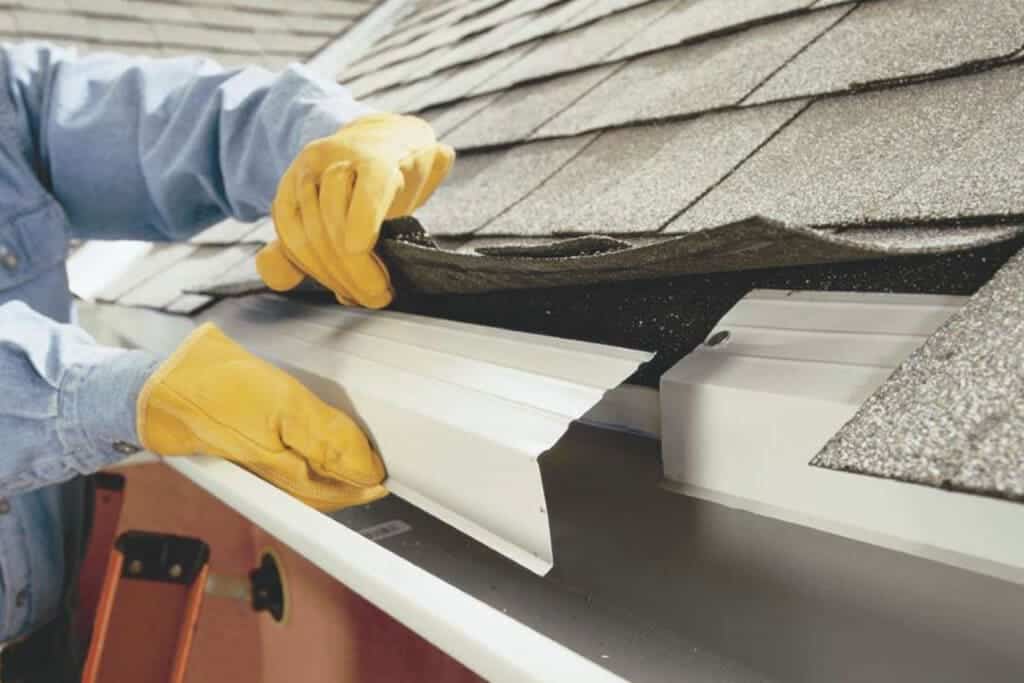
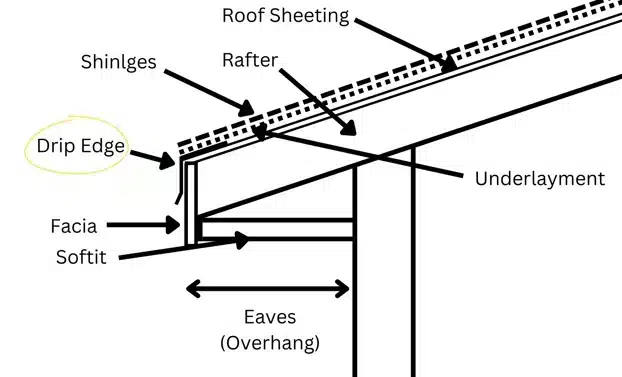
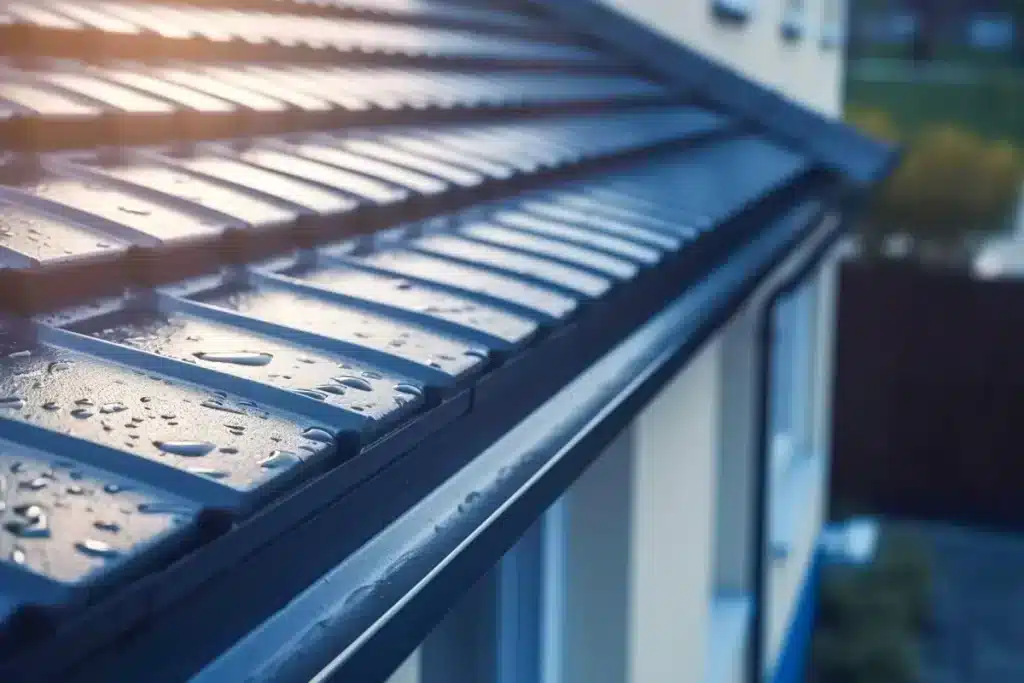
Who would want a corroded or ruined house roofing? Of course, no one would want that for our beloved house. Whether it’s a professional monthly roof cleaning or just maintaining the overall look of your house, at the end of the day, your home is all that matters. The roof drip edge is an essential part typically composed of metal and has an L form. Guiding water into gutters rather than the fascia stops water damage from occurring under the shingles. Drip edge flashing is required for most North American construction regulations because it shields homes from water damage. Varied kinds, such as galvanised steel, are suitable for roofing requirements. Gable and metal roof installation must be done correctly to prevent ice dams and save the fascia board. Drip edges are a top priority for homeowners who want to guarantee their roof’s long-term efficacy and durability. Let us understand the factors that made us choose the drip edge flashing for our rooftop.
Why Use Roof Drip Edge?
A roof drip edge is a crucial part of a roofing system that is intended to improve the roof’s performance and lifespan. Here’s a detailed look at the benefits of using a roof drip edge.
1. Keep Water Off of Fascia to Avoid Fascia Rot
- Water Redirection
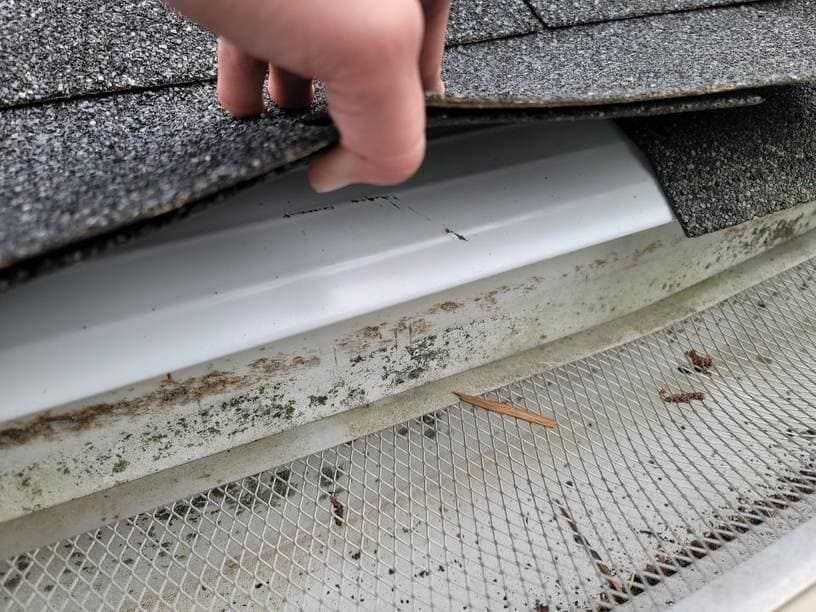
Redirecting water away from the fascia board is the primary purpose of a drip edge. Without it, water may adhere to the fascia and cause rot and degradation.
- Surface Tension
Cohesion and surface tension cause water droplets to adhere to surfaces. Using these pressures, a drip edge directs water into the gutter and stops it from flowing down the fascia.
- Gravity Assistance
A drip edge guarantees that water is effectively guided into the gutter system in addition to gravity. This keeps water from leaking into the soffit cavity, which could lead to mold growth and structural damage.
- Leak Prevention
Without a drip edge, water may seep beneath the shingles, increasing the risk of leaks and severe harm to the home’s inside.
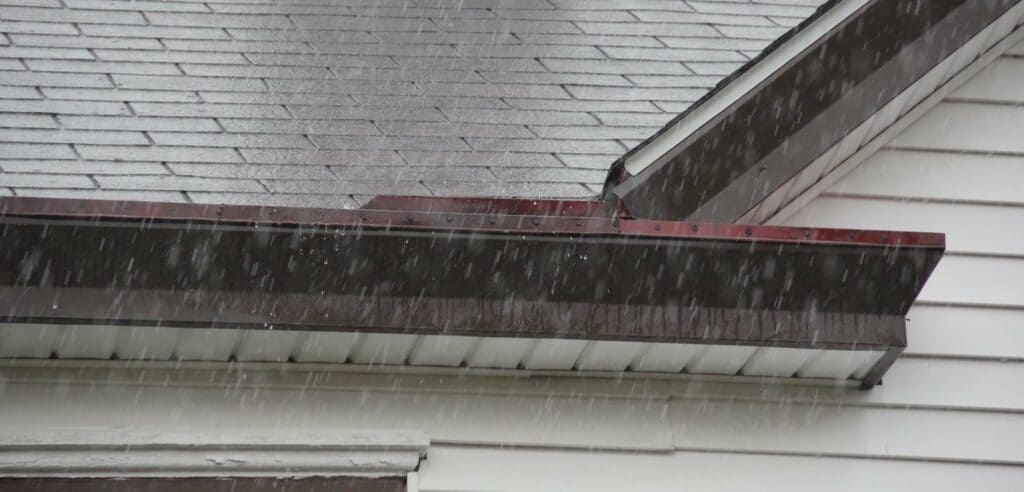
2. Guard Against Rain Caused by the Wind Counteract Wind Effects
- Wind Resistance
Wind can move rainwater around the roof during extreme weather. Rain pushed by the wind cannot penetrate the roofing system because a drip edge extends beyond the roof’s edge.
- Upward Water Pressure
The drip edge’s design counteracts the upward pressure of water caused by solid winds by having its lower flange hangs considerably over the roof edge.
- Edge Security
Shingles, underlayments, and ice and water protectors are installed to protect the roof deck from wind-driven rain. However, without a drip edge, the edges are weak. A drip edge strengthens the roof’s overall resilience by fastening the edges.
- Entire Coverage
A drip edge is essential for keeping water from dripping off the fascia and causing damage, especially in the absence of gutters.
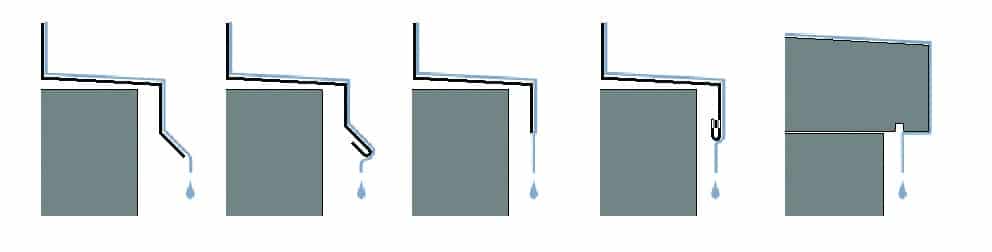
A Glimpse at the Profile Types of Drip Edge Flashing
Flashing around the drip edge of a roof is essential to preventing water damage to houses. It prevents seepage into the underlying structure by channeling water away from the fascia and roof. Awareness of the many profiles available can make choosing the appropriate drip edge flashing type for a roofing application easier.
· Type C: The Traditional L-Shaped Dripping Edge
The Type C drip edge, sometimes known as the L style, has a traditional L-shaped design. It has a lower flange at the bottom and is bowed at a 90-degree angle. This arrangement efficiently diverted water from the roof edge. Despite being approved by most building codes, Type C is not the preferred option of the Asphalt Roofing Manufacturers Association (ARMA) since it diverts water less effectively than Type D.
· Type D: Superior T-Shaped Defense
Type D drip edges have a T-shaped profile with a lower flange, called D-metal or T style. This design provides better protection against water infiltration, keeping water farther away from the fascia. Because this profile offers better water diversion than the L-shaped Type C, ARMA favors it.
· Type F: Enhanced Coverage with an Extended Gutter Apron
Because of its long leading edge, Type F, also known as the F style, is perfect for installation over pre-existing shingles or rake edges. This profile, sometimes called a gutter apron, offers more coverage and is especially helpful in windy regions since it keeps water from dripping below the gutters.
· J-Channel Drip Edges
Although sold in stores, these are made for doors and windows, not roofing.
The National Roofing Contractors Association (NRCA) advises against vented drip edges on roofs because they allow water infiltration.
Lengths and Prominences
Although 8-foot lengths are also offered, 10.5-foot lengths are standard for drip edges. Depending on the roof’s needs, overhang lengths might be two to five inches.

Drip Edge Material Types
· Aluminum: Corrosion-resistant and lightweight
Due to its remarkable corrosion resistance and lightweight nature, aluminium is preferred for drip-edge construction. This material is perfect for locations exposed to frequent rainfall or humidity because it provides dependable protection against damage caused by moisture. Furthermore, a range of colors for aluminum drip edges enables homeowners to blend them in perfectly with the overall appearance of their roofs.
· Galvanized Steel: Sturdy Defense Against Inclement Weather
Because of its robustness and longevity, galvanised steel drip edges are popular in regions that frequently experience severe weather and strong winds. By applying a layer of zinc to the steel, the galvanization process efficiently stops rust and corrosion. Choosing a minimum of 24-gauge steel guarantees that your roof will be sufficiently resilient to handle external stresses and last for a long time.
· Copper: Classic Style and Outstanding Function
Copper drip edges give a touch of refinement to the roof line and provide dependable performance. Copper adds a unique visual appeal that elevates the property’s overall beauty with its natural patina that grows over time. A minimum thickness of 0.69 mm, or 20 ounces, is required for copper drip edges to be durable, resilient to environmental conditions, and long-lasting.
· Fiberglass, Vinyl, and Plastic: Uses Other Than Roofs
Although drip edges made of plastic, vinyl, and fibre glass are available, they are usually more appropriate for use in non-roofing situations, like over doors and windows. These materials are less suitable for roofing applications where moisture protection is crucial since they cannot be as strong and resistant to weather as those meant for direct exposure to the elements.
How to Install Roof Drip
1. Getting Ready and the Type C Drip Edge
- Make sure the deck is ready for installation on the roof.
- Consider adding a furring strip to improve roof drip edge performance for Type C drip edges.
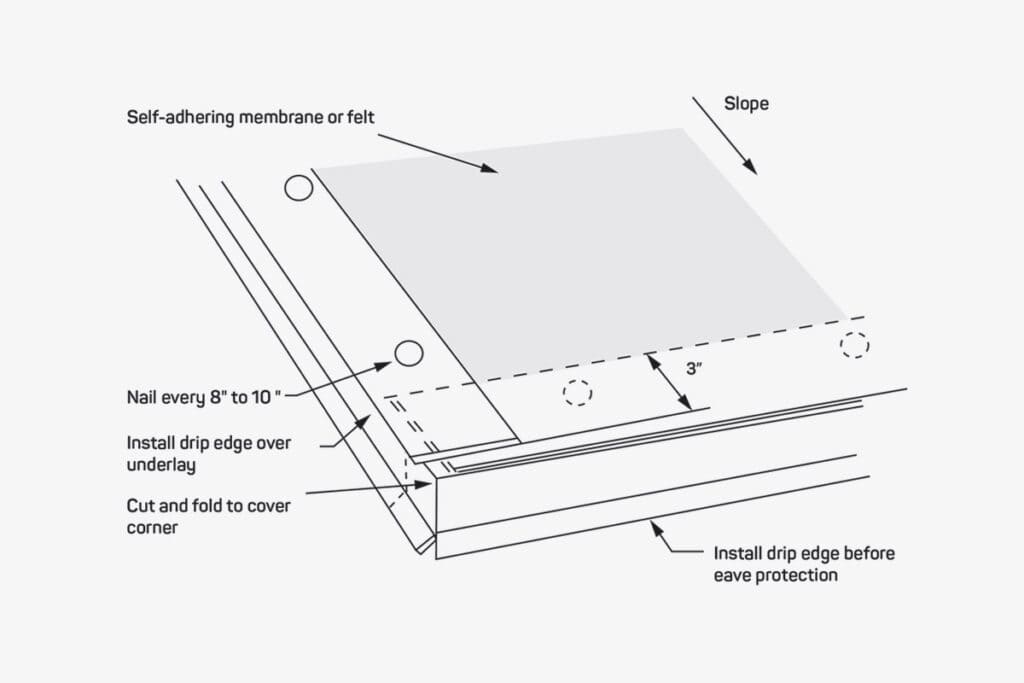
2. Installation of Eaves
- To ensure that water enters the gutters, align the roof drip edge.
- Every 12 inches, overlap the edges and secure with roofing nails.
- Cut drip edges precisely where rake and eaves edges converge at corners.
3. Positioning of the Underlayment
- Cover the drip edge of the eaves with underlayment.
4. Installation of Rakes
- Attach drip edges to a roof rake to resemble the eave process.
- If necessary, take care of corner overlaps.
5. Installation of Ridges
- Adjust the drip edge to the curve of the roof crest.
- Fasten for a tidy, polished appearance.
6. Verification of Compliance
- Check that local building codes and regulations are being followed.
These instructions will help install roof drip edges efficiently, protecting your roof structure and guaranteeing appropriate water diversion.
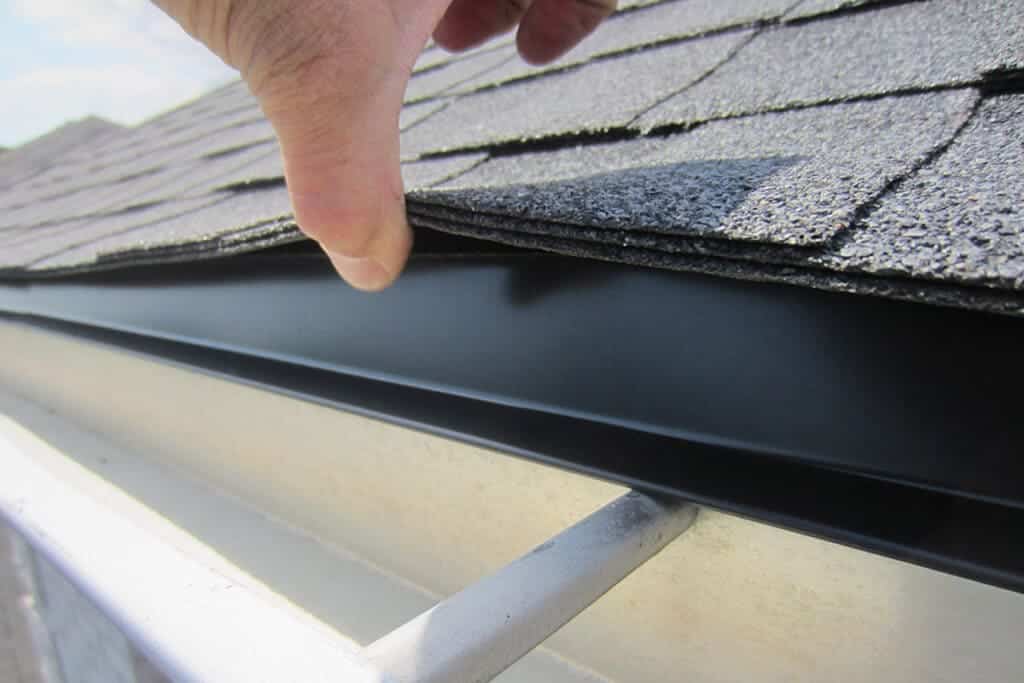
Replacing the Drip Edge for a Roof
Replacing the drip edge is essential to maintain appropriate water drainage and shield the roof’s margins from water damage. Now that we have an idea of how to install drip edges, let’s see how we can actually replace them.
· Step 1: Set Up the Space
Before beginning the replacement operation, ensure you have the required tools and safety gear. Among the tools needed are a flat pry bar, hammer, cement, roofing nails, and safety glasses and gloves. Additionally, pick a day with good weather to work on the roof.
· Step 2: Remove Shingles
Carefully lift the shingles on the roof drip edge using a flat pry bar. Take care not to harm the shingles as you work around the edge, starting at one end. Find the nails securing the current drip edge.
· Step 3: Take Out the Old Drip Edge
Gently pry out the nails holding the current roof drip edge to the roof using the flat pry bar and hammer. Be cautious not to harm the nearby roofing materials. After extracting the nails, carefully remove the outdated drip edge from beneath the shingles and dispose of it appropriately.
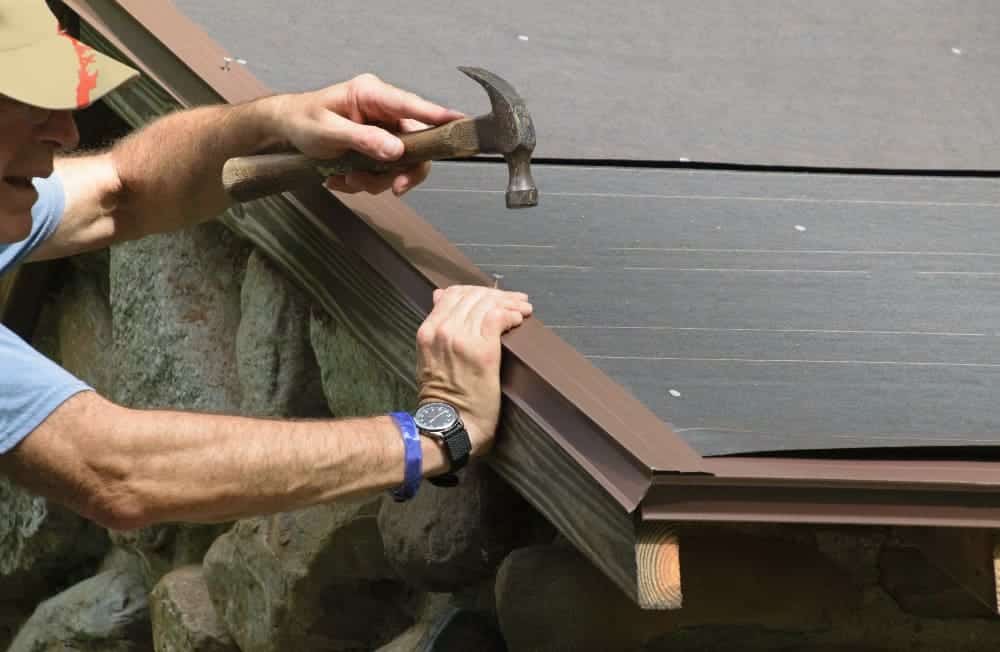
· Step 4: Install a New Drip Edge
When positioning the new drip edge along the roof drip edge, ensure it extends slightly above the fascia and overlaps the eaves. After putting cement along its underside, use roofing nails to firmly fasten the drip edge. Use enough nails, but don’t drive them too far, which could harm the roof.
· Step 5: Protect Your Shingles
Get another roofing expert’s assistance as you install the new drip edge to support the shingles. This will ensure that the shingles are installed correctly and won’t hinder the properly installed drip. After the drip edge is firmly in position, gently lower the shingles once more to ensure they rest flat and smoothly along the roof’s edge.
Final Thoughts
As we finally come to an end, we assess that to prevent water damage to your property and extend the life of your roofing system, you need to install a roof drip edge. To avoid ice dams and decay, a roofing drip edge, also known as drip edge metal flashing, is installed and diverts water away from the fascia board and into the gutters. Knowing the many types of roof drip edges and how to install them correctly are crucial, regardless of whether you’re working with metal or galvanised steel drip edges. It takes skill and focus to replace a drip edge on a roof or secure the drip edge installed on gable roofs.
In conclusion, every part, from the rake boards to the rake edge, contributes to your house’s safety. Drip edges are essential to any roof installation or roof repair operation because they ensure a safe and long-lasting roof.