
Table of Contents
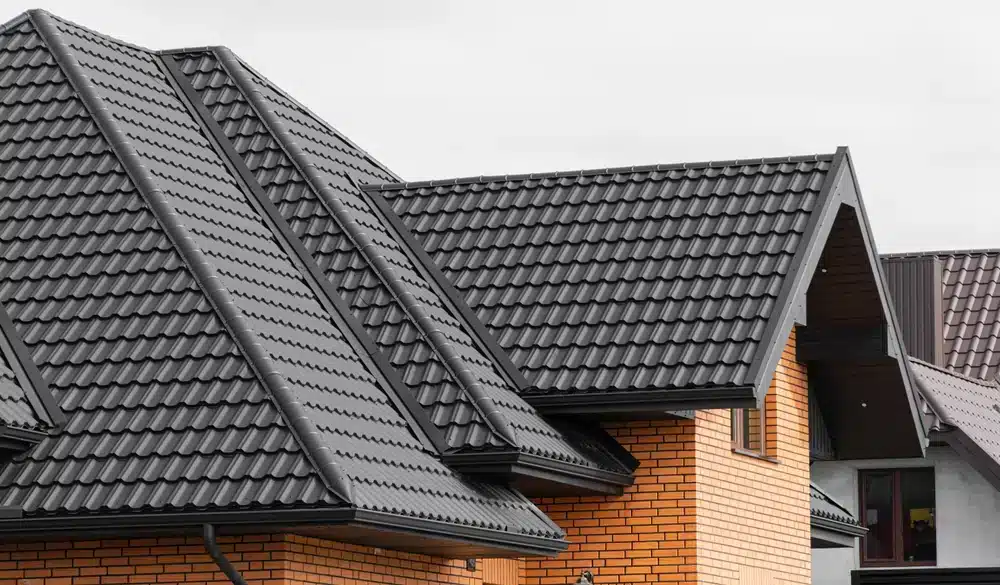
Homeowners look for an amalgamation of aesthetics and durability when it comes to designing the house. This is especially true in the case of roofing choices. Your roof is the ultimate shield protecting your home from adverse weather elements. A well-chosen roof not only improves the curb appeal of the house but also promises long-term protection. However, with the plethora of options available in the market, choosing one that suits your needs and budget might be difficult. If you are stuck in such a situation, don’t worry; I am here to help you. Metal roofs have ascended to widespread acclaim due to their unique features and characteristics. So, if you have selected metal roofing, this guide will cover the detailed steps to install metal roofing so you don’t have to look out for it yourself.
It is worth mentioning that homeowners prefer metal roofing because of its durability, energy efficiency, and sleek appearance. Although installing a metal roof can appear difficult, it can be a DIY project with the right tools and guidance. Let’s go through the guide to durable roofing.
1. Planning and Preparation

Any DIY project calls for in-depth research, planning, weighing the pros and cons, and considering different ways to accomplish one thing. So, if you want flawless metal roofing, start with thorough planning.
Evaluate Your Roof
Folks, inspect the components of your current roof before beginning. Make sure it’s in good shape because if the current asphalt shingles are in good shape, metal roofing can be placed over them. On the other hand, any rotting or damaged roof decking needs to be replaced or repaired.
Assemble Equipment and Materials
The following supplies and equipment are required:
- Panels made of metal
- Underlayment for roofs
- Trimming and flashing
- Screws or fasteners for roofing (ideally exposed fasteners or metal roofs with standing seams)
- A circular saw fitted with a metal cutting blade or metal snips
- A measuring tape
- Mark the line in chalk
- Stepladders
- Safety equipment and harness
- A utility knife
Calculate and Measure
The next step is to find the square footage of your roof and measure its length and width. Determine the number of metal panels required. To account for cuts and waste, add 10%. For precise dimensions and specifications, particularly for standing seam metal roofs, see the manufacturer’s specifications.
2. Remove Old Roofing
Okay, my creative heads, before the new metal roof takes center stage, you need to remove the old one, right? It is like establishing the foundation for a new roof by removing the old one.
Time to Remove Old Roof
If you are removing the old roofing, begin by removing any old metal panels or asphalt shingles. You can lift and remove them with a shovel or pry bar. Then, verify the smoothness of the roof deck and remove any debris.
Examine the Deck
Look for any signs of roof decking deterioration. Before moving forward, fix any problems, such as decaying wood or cracked boards.
3. Put in Underlayment to Install Metal Roofing

It’s time to install an invisible protection layer and an unsung hero, i.e., underlayment. It creates a barrier against moisture and provides extra security, paving the way for your metal panels to shine.
Lay the Underlayment
Spread felt or synthetic roof underlayment evenly across the whole roof surface. This layer acts as an additional moisture barrier. Secure each row with roofing nails or staples, allowing at least 2 inches of overlap between them.
Seal the Edges
To stop water from seeping through the underlayment, sealant tape or roofing cement should be used, especially at the perimeter of the wall and roof.
4. Set Up the Flashing to Install Metal Roofing
It might not steal the spotlight, but it makes sure that every edge is sealed properly.
Fit Flashing to the Roof
Flashing is essential to keep water away from vulnerable places like roof joints and chimneys. Install flashing around chimneys, skylights, and vents on your roof. Use roofing cement to seal the edges and fasten it firmly with roofing screws or nails.
Install Eave Flashing
Install eave flashing along the edge of the roof where the eaves meet the roof. Water cannot infiltrate beneath the metal panels as a result. Additionally, make sure the border of the roof underlayment is overlapped by the eave flashing.
5. Install Metal Panels

With every other thing being done properly, it’s time to embrace the star of the show, i.e., Metal Panels.
Take Off from the Eaves
Working your way up to the ridge, begin the metal roof installation process at the eaves. Using roofing screws, align the first panel with the edge of the roof. Use screws made specifically for metal roofing; they will have a rubber washer to guarantee a tight seal.
Overlap Panels
As advised by the manufacturer, overlap each succeeding metal panel over the preceding one. Preventing water leaks requires this overlap. Additionally, make sure the panels and drip edge fit properly.
Section Panels as Required
Metal snips or a circular saw can be used to measure and cut panels to the desired length and breadth for the roof. To protect the panel’s coating, cut from the underside only.
Securing Panels
Roof screw each panel in place. To prevent water leaks, screw into the high points rather than the valleys of the panel’s ribs. Comply with the screw placement and spacing instructions provided by the manufacturer.
Put in the Ridge Cap
To hide the seams between the panels, the ridge cap is put in place at the top of the roof. After securing it with screws, slide the ridge cap over the top of the closure. Make sure the panels underneath the cap overlap.
You can also look into the tutorial video to install a metal roof. Below is the link.
6. Finishing Steps to Install Metal Roofing
It’s time to focus on the finishing touches to complete your DIY project.
Examine and Seal
Evaluate the entire roof to make sure there are no leaks or gaps and that all of the panels are in place. If more roofing sealant is required, apply it to the edges and seams. Furthermore, make sure the closure strip is put in correctly where the roof panels join the ridge.
Tidy Up
Clear the roof of any extra material, tools, and debris. Make sure the roof is clean and clear of impediments and that all screws and fasteners are placed correctly.
7. Safety Tips to Install Metal Roofing

To avoid any unfortunate events, make sure to follow safety tips.
Put On Appropriate Safety Gear
When working on the roof, always wear a safety harness, non-slip shoes, and other suitable protective gear. Certain metal roofs can be slick, particularly when wet.
Tasks in Adequate Weather
Select a dry, clear day for installation to lower the possibility of mishaps and guarantee correct material adhesion.
Stick to Guidelines
Follow the directions provided by the manufacturer for the particular kind of metal roof you are installing. There might be differences in the installation needs of different goods.
However, if you want to look into different roofing options, such as copper roofing, here is the guide covering the nuances and intricacies of this roofing type.
Conclusion
Summing up, the article covered details on easy steps to install metal roofs. Not only can you enhance the overall look of your home, but also make sure that your roof is durable. So, let’s embrace metal roofing to make your house amazing.